iPhone has an excellent reputation, and users are assured of having a smartphone that lasts for a long time. However, the longer you use it, its port can eventually wear off just like everything else. Most of the time, users face a condition when their iPhone doesn’t charge, it isn’t because of the hardware failure, but it happens due to the clogging up of dirt, small debris, dust, and lint in the charging port. If you are also facing a similar condition, then you’ve come to the right place.
With the help of the right tools and proper handling, it isn’t as hard as you think it could be. Here, we will explain briefly a few ways to clean your iPhone’s charging port with the help of simple tools.
What Are The Tools Needed to Clean iPhone Charging Port?
If you own an iPhone, you’re probably familiar with the frustration of a charging port that gets clogged with dirt, lint, and debris over time. When this happens, your iPhone may not charge properly, and you risk damaging the delicate components if you’re not careful. But fear not! In this comprehensive guide, we’ll show you how to clean your iPhone’s charging port safely and effectively, without the risk of breaking it. Whether you’re experiencing charging issues or simply want to prevent future problems, we’ve got you covered.
Why Does the Charging Port Get Dirty?
Before we dive into the cleaning process, let’s explore why your iPhone’s charging port gets dirty in the first place. As we carry our iPhones in our pockets, bags, and hands, they inevitably pick up dust, lint, and other debris. When you plug in your charger, these particles can get pushed into the charging port, gradually building up over time. This accumulation can obstruct the connection between the charger and the port, leading to charging problems. Now, let’s get started with the cleaning process.
What You’ll Need
To clean your iPhone’s charging port effectively, you’ll need a few essential tools. Here’s a list of items you should gather before you begin:
- Flashlight: A small flashlight will help you see inside the charging port and identify any dirt or debris.
- Toothpicks: These will be used to dislodge any visible debris gently. Be sure to use them with caution to avoid damaging the port.
- Compressed Air (optional): While Apple doesn’t recommend using compressed air to clean iPhones, it can be a successful method if used carefully. If you choose to use compressed air, make sure to follow the instructions provided and avoid inserting anything other than a toothpick into the port.
Step-by-Step Cleaning Process
Step 1: Switch Off Your iPhone
Before you start cleaning your iPhone’s charging port, make sure to switch it off. This will prevent any potential damage or accidents while you’re working on it.
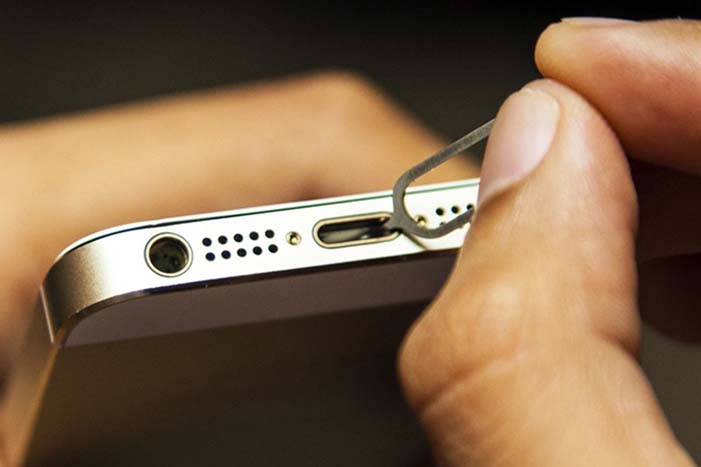
Step 2: Examine the Charging Port
Grab your flashlight and take a close look at the charging port. This will give you a better understanding of the dirt and debris you’ll be dealing with. It’s a good idea to examine the port after each cleaning step to track your progress.
Step 3: Clear Immediate Dust with Compressed Air (Optional)
If you’ve chosen to use compressed air, hold the can upright and give the charging port a few short blasts to clear away any immediate dust. Afterward, try plugging in your iPhone to see if the problem is resolved. If not, move on to the next step.
Step 4: Dislodge Debris with a Toothpick
Using a toothpick, gently insert it into the charging port and move it from side to side to dislodge any visible debris. Be extremely careful not to apply too much pressure or damage the delicate components. If you notice any debris on the toothpick, wipe it off with a dry cloth or use a fresh toothpick to continue. Test the charging port by plugging in your iPhone and checking if it charges properly.
Step 5: Scrape the Port’s Walls
If the previous steps haven’t resolved the issue, you can gently scrape the toothpick against the walls of the charging port. Again, exercise caution and avoid applying excessive pressure. Regularly check the toothpick for any debris and continue cleaning until you notice an improvement in the charging ability.
Step 6: Repeat Steps 3-5 if Necessary
If your iPhone still isn’t charging correctly, you can repeat steps 3-5 as needed. Use compressed air sparingly, and only insert a toothpick into the port. It’s essential to be patient and persistent during this process.
Step 7: Seek Professional Help
If, after multiple attempts, your iPhone still fails to charge properly, it’s time to seek professional assistance. Take your device to an authorized Apple service center, where technicians can diagnose and resolve any underlying issues with your charging port.
Additional Tips and Considerations
Prevention is Key
To prevent future charging port issues, consider these preventive measures:
- Keep your iPhone in a clean and dust-free environment.
- Avoid using your iPhone while it’s charging to minimize dust and debris entering the charging port.
- Regularly inspect the charging port for any signs of dirt or obstruction and clean it accordingly.
Beware of DIY Repairs
While cleaning your iPhone’s charging port is a relatively simple task, it’s essential to exercise caution and avoid attempting any DIY repairs beyond cleaning. Opening your iPhone or tampering with its internal components can void your warranty and potentially cause irreversible damage.
Explore Other iPhone Maintenance Guides
Cleaning your iPhone’s charging port is just one aspect of maintaining your device. To optimize your iPhone’s performance and longevity, consider exploring other helpful maintenance guides, such as cleaning your iPhone’s speakers, saving battery life, or identifying plants using your iPhone’s camera.
Conclusion
Cleaning your iPhone’s charging port doesn’t have to be a daunting task. With the right tools, careful attention, and the step-by-step instructions provided in this guide, you can safely and effectively clean your iPhone’s charging port without the risk of breaking it. Remember to exercise patience, be gentle, and seek professional help if needed. By taking proper care of your iPhone, you can ensure that it continues to charge efficiently and serve you well in the long run.