
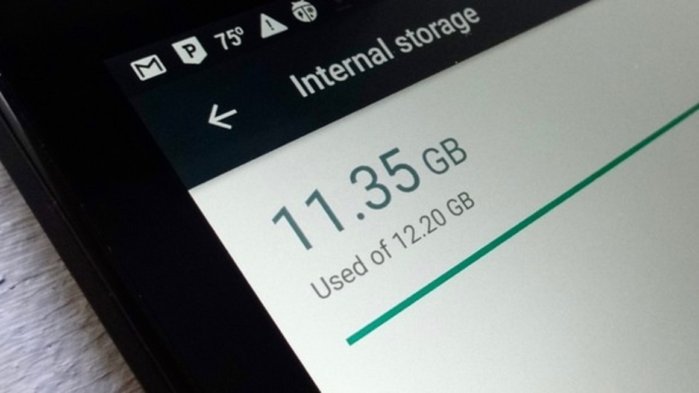
As an Android user, you may have noticed that your phone’s storage capacity is limited compared to a desktop or laptop computer. To keep your device running smoothly, it’s important to regularly clear out unnecessary files and free up storage space. Additionally, deleting files is crucial for maintaining the security and privacy of your personal data. In this comprehensive guide, we’ll walk you through the process of emptying the trash on your Android phone or tablet. Whether you use popular apps like Google Photos or Files by Google, or you prefer to rely on individual app trash deletion, we’ve got you covered.
1. Does Android Have a Trash Folder?
One common misconception among Android users is the existence of a trash folder similar to the recycle bin in Windows. Unlike Windows, Android does not have a universal trash folder. When you delete a file on Android, it is not immediately removed from your device. Instead, the Android operating system marks it as a deleted file, and it remains on your device for a specified period, usually 30 days. After the designated time or when storage space is needed, the file is permanently deleted. While Android does not have a centralized trash folder, individual apps may have their own trash sections for deleted files.
2. How to Empty Trash on Android
To empty the trash on your Android phone or tablet, you can follow different methods depending on the apps you use and your device’s settings. In this section, we will guide you through the process of emptying the trash in two popular apps: Google Photos and Files by Google.
Clearing the Trash in Google Photos
Google Photos is a widely used app for managing and storing photos and videos on Android devices. If you want to clear the trash in Google Photos, follow these steps:
- Open the Google Photos app on your Android phone or tablet.
- Tap on the “Library” tab located in the bottom bar of the app.
- In the “Library” screen, tap on “Trash” at the top.
- Once in the “Trash” section, tap on the three dots in the top-right corner.
- From the menu that appears, select “Empty Trash.”
- A prompt will ask you to confirm the action. Tap “Allow” to permanently delete all the photos and videos in the trash.
By emptying the trash in Google Photos, you can free up storage space on your Android device and ensure that you no longer have unnecessary files taking up valuable storage.
Emptying the Trash in Files by Google
Files by Google is a versatile file manager app that allows you to organize, browse, and clean up files on your Android device. To empty the trash in Files by Google, follow these steps:
- Launch the Files by Google app on your Android phone or tablet.
- In the top-left corner of the app, tap on the hamburger menu (three horizontal lines).
- From the menu, select “Trash.” This will display the deleted files in the trash.
- To delete all the files in the trash, tap on the checkbox labeled “All Items” at the bottom.
- Once you have selected all the files, tap on the “Delete” button.
- A prompt will appear, asking you to confirm the deletion. Tap on “Delete” to permanently remove the files from your device.
Files by Google provides a convenient way to manage and delete unnecessary files, helping you optimize your device’s storage.
Other Methods to Free Up Storage on Android
In addition to emptying the trash in specific apps, there are other ways to free up storage space on your Android phone or tablet. Here are a few methods you can try:
- Clear App Cache: Many apps accumulate temporary files and cache data over time, which can take up significant storage space. To clear the cache for individual apps, follow these steps:
- Go to the Settings app on your Android device.
- Find the “Apps” or “Applications” section.
- Select the app you want to clear the cache for.
- Tap on “Storage” or “Storage & cache.”
- Finally, tap on the “Clear cache” button to remove the cached files.
- Reduce Storage Usage in Apps: Some apps, such as messaging apps like WhatsApp or cloud storage apps like Dropbox, allow you to manage and reduce their storage usage. Check the settings of these apps to see if there are any options to clear unnecessary files or optimize storage.
By implementing these additional methods, you can further optimize your Android device’s storage and ensure that you have enough space for new files and apps.
3. Files by Google: Clearing Trash and More
Files by Google is a powerful file management app developed by Google itself. In addition to emptying the trash, Files by Google offers various features to help you organize and optimize your device’s storage. Let’s explore some key functions of the app.
Moving Files to Trash in Files by Google
Files by Google allows you to move files from various apps to its own trash, making it easier to manage and delete unwanted files. Here’s how you can move files to the trash using Files by Google:
- Open the Files by Google app on your Android device.
- Navigate to the “Browse” tab within the app.
- Select the category of files you want to send to the trash, such as “Images” or “Videos.”
- Choose a file you wish to delete and tap on the three-dot icon located on the right side.
- From the options that appear, tap on “Move to Trash” to transfer the file to the trash folder.
- To confirm the action, tap on “Move 1 file to Trash.”
By moving files to the trash in Files by Google, you can keep your device organized and easily manage files that you no longer need.
Permanently Deleting Files in Files by Google
After moving files to the trash in Files by Google, you can permanently delete them to free up storage space on your Android device. Follow these steps to permanently delete files in Files by Google:
- Go to the “Clean” tab within the Files by Google app.
- Tap on the menu icon located at the top-left corner of the screen.
- From the menu, select “Trash” to access the files in the trash folder.
- You can choose individual files to delete by tapping on them, or use the “All items” checkbox at the top to select all files.
- Once you have selected the files you want to delete, tap the “Delete” button.
- Files by Google will prompt you to confirm the deletion. Tap on the red “Delete” button to finalize the process.
By permanently deleting files in Files by Google, you can reclaim storage space on your Android device and ensure that unnecessary files are completely removed.
Using the Safe Folder to Protect Important Files
Files by Google also offers a feature called the Safe Folder, which provides an added layer of protection for your important files. By moving files to the Safe Folder, you can prevent them from being deleted accidentally or by unauthorized users. Here’s how you can use the Safe Folder in Files by Google:
- Open the Files by Google app on your Android device.
- Navigate to the “Browse” tab within the app.
- Select the category of files containing the important file you want to protect.
- Locate the file and tap on the three-dot icon next to it.
- From the options that appear, tap on “Move to Safe Folder” to transfer the file to the Safe Folder.
- The file will now be securely stored in the Safe Folder and cannot be deleted unless you choose to remove it manually.
The Safe Folder feature in Files by Google gives you peace of mind knowing that your important files are safeguarded from accidental deletion or unauthorized access.
4. Individual App Trash Deletion: Google Photos
Google Photos is a popular app for managing and storing photos and videos on Android devices. If you prefer to delete files directly from within the app, here’s how you can do it:
Accessing the Trash in Google Photos
- Open the Google Photos app on your Android device.
- Tap on the “Library” tab located at the bottom of the screen.
By accessing the Library tab in Google Photos, you can view and manage the files stored in the app.
Selecting and Deleting Files in Google Photos
- Within the Library section, tap on “Trash” to access the deleted files.
The Trash section in Google Photos contains all the files that you have deleted.
- Select the files you want to delete by tapping on them. You can choose individual files or select all the images from a specific date.
By selecting the files in the Trash section, you can prepare them for permanent deletion.
Confirming Deletion in Google Photos
- Once you have selected the files you want to delete, tap on the three-dot icon located at the top-right corner of the screen.
- From the menu that appears, select “Delete from Device” to permanently remove the files from your Android phone or tablet.
- Google Photos will ask you to confirm the deletion, as it is an irreversible action. Tap on the “Delete” button to finalize the process.
By following these steps, you can conveniently delete unwanted photos and videos from Google Photos, freeing up storage space on your Android device.
Frequently Asked Questions
How Often Should I Empty My Android Device’s Trash?
The frequency of emptying your Android device’s trash depends on your personal preference and the specific circumstances. If you notice that your device is slowing down or running out of storage space, it may be a good time to empty the trash. Additionally, if you have files containing sensitive information that you no longer need, it is advisable to delete them as soon as possible for security reasons.
Can I Recover a Permanently Deleted File?
No, once a file is permanently deleted from your Android device, it cannot be recovered. Android retains deleted files for a specific period, usually 30 days, to provide users with a chance to recover them if needed. However, once the file is permanently deleted or the section of the device’s memory holding the file is overwritten, recovery becomes impossible. Although some apps claim to recover deleted files, they may not be able to restore the entire file.
How Can I Protect Certain Important Files from Deletion?
Files by Google offers a Safe Folder feature that allows you to protect important files from deletion. By moving files to the Safe Folder, you can ensure that they remain secure and cannot be deleted accidentally. The Safe Folder provides an additional layer of protection for your important files, giving you peace of mind.
Conclusion
In conclusion, emptying the trash on your Android phone or tablet is essential for optimizing storage space and maintaining the security of your personal data. Whether you choose to use apps like Google Photos and Files by Google or rely on individual app trash deletion, regularly clearing out unnecessary files is crucial. By following the steps outlined in this guide, you can efficiently manage and delete files, ensuring that your Android device runs smoothly and securely.
Experiencing difficulties with your Device, check out our “How To” page on how to resolve some of these issues.