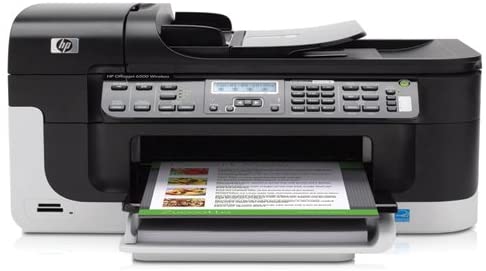
Faxing is still an essential communication tool in many industries, allowing businesses to send and receive important documents quickly and securely. Traditionally, fax machines required a dedicated phone line to operate. However, with technological advancements, it is now possible to set up fax functionality on an HP printer without the need for a phone line. In this comprehensive guide, we will walk you through the step-by-step process of setting up fax on an HP printer without a phone line.
Preparing for HP Digital Fax Setup
Before setting up HP Digital Fax, there are a few essential steps you need to take to ensure a smooth setup process.
Check Fax Capability: Ensure that your HP printer is capable of sending and receiving faxes. It should be connected to a telephone landline or digital telephone service.
Install the HP Smart App: Download and install the HP Smart app from the Microsoft Store or Mac App Store, depending on your operating system. The app is essential for setting up and managing HP Digital Fax.
Administrator Computer: Ensure that the computer or server where the destination folder is located is powered on and in a ready state at all times. This is necessary for saving incoming faxes to a network folder.
To save incoming faxes when using HP Digital Fax, you need to set up a shared network folder that can be accessed by other users or devices on the network. The process for creating a shared network folder differs depending on your operating system.
- Open the File Explorer on your Windows computer.
- Navigate to the location where you want to create the shared network folder.
- Right-click on the desired location and select “New” > “Folder” from the context menu.
- Give the folder a name and press Enter.
- Right-click on the newly created folder and select “Properties” from the context menu.
- In the Properties window, go to the “Sharing” tab.
- Click on the “Share” button.
- Select the users or devices with whom you want to share the folder.
- Set the appropriate permissions for the shared folder, allowing full read and write access.
- Click “Apply” and then “OK” to save the changes.
- Open the Finder on your macOS computer.
- Navigate to the location where you want to create the shared network folder.
- Click on “File” in the menu bar and select “New Folder” from the drop-down menu.
- Give the folder a name and press Enter.
- Right-click on the newly created folder and select “Get Info” from the context menu.
- In the Info window, expand the “Sharing & Permissions” section.
- Click on the lock icon and enter your administrator password to make changes.
- Click on the “+” button and add the users or devices with whom you want to share the folder.
- Set the appropriate permissions for the shared folder, allowing full read and write access.
- Close the Info window to save the changes.
Setting Up HP Digital Fax (HP Smart App)
Once you have completed the preliminary steps, you can proceed with setting up HP Digital Fax using the HP Smart app. Follow these steps:
Open the HP Smart app on your computer.
If your printer is not already added to the app, click on “Add Printer” or the plus sign to add it.
Select your printer from the list of available devices.
Scroll down to find the “Advanced Settings” or “Printer Home Page (EWS)” option and click on it.
If prompted, log in with the administrator username and password. For HP LaserJets, the username is “admin”, and the PIN can be found on the printer label.
From the Home or Fax tab, click on “HP Digital Fax”.
Click on “Modify” next to the preferred Digital Fax option to complete the setup.
It’s important to note that the available setup options may vary depending on your printer model and the type of connection (network or USB).
To explore additional Digital Fax options, you can check the Fax or Setup menus on the printer control panel.
Sending a Test Fax
After setting up HP Digital Fax, it is crucial to send a test fax to ensure that you can both send and receive faxes successfully. Here’s how you can send a test fax:
Create a one-page black and white test fax document.
Add your fax number to the fax header, ensuring it matches the number of the phone line connected to the fax.
Temporarily disable any conflicting phone line services, such as voice mail, call waiting, anonymous call rejection, privacy manager, and caller ID. These services can interfere with incoming faxes.
Send the test fax to1-888-HPFaxme (1-888-473-2963 U.S.).
Wait for approximately 5 to 7 minutes for the service to send a return fax.
If you do not receive a return fax within 10 minutes, double-check your fax settings and try sending the test fax again.
Frequently Asked Questions (FAQs)
What are the requirements for using Mobile Fax with the HP Smart app?
To use Mobile Fax with the HP Smart app, you need the following:
An HP Smart account
A computer or mobile device with:
Windows 10 Redstone 5 (version 1809) or later
macOS Mojave (10.14) or later
Android Pie (9.0) or later
Apple iOS or iPadOS 14 or later
A sender name and valid phone number to send faxes with
What should I do if a ‘Delivery Failed’ or an ‘SFAPI’ error occurs?
If you encounter a ‘Delivery Failed’ error or an ‘SFAPI’ error while sending a fax, try the following troubleshooting steps:
Ensure that the fax number you dialed is correct and that the recipient’s fax machine is ready to receive faxes.
Check for any temporary disruptions in internet service or the phone system. Retry sending the fax after a few moments.
Refer to the HP Mobile Fax Error Codes Troubleshooting guide for specific error codes and recommended solutions. If the issue persists, contact HP Customer Support for further assistance.
Conclusion
By following the steps outlined in this guide, you can easily set up fax functionality on your HP printer without the need for a phone line. This convenient feature allows you to send and receive faxes digitally, eliminating the need for physical paper and ink. Whether you’re a small business owner or a home user, HP Digital Fax provides a reliable and efficient solution for your faxing needs. Say goodbye to traditional fax machines and embrace the convenience of digital faxing with HP.


