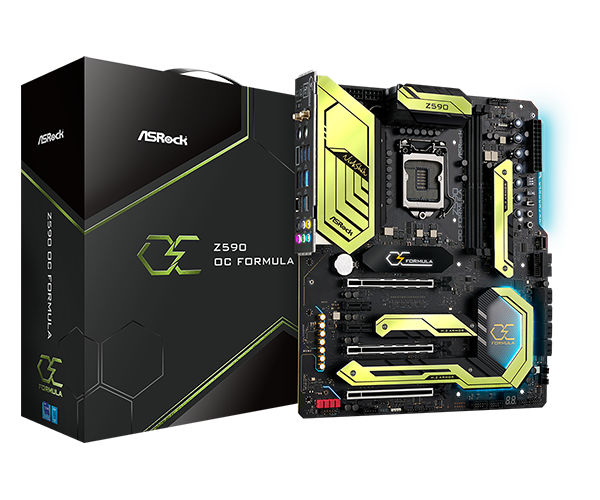
When it comes to building or upgrading a computer, understanding motherboard connectors and headers is crucial. These components play a vital role in ensuring that all your hardware components work seamlessly together. In this comprehensive guide, we’ll take a detailed look at various motherboard connectors and headers, demystifying their functions and configurations.
Power Connectors:
ATX Main Power Connector(24-pin)
Most modern motherboards come equipped with a standard 24-pin ATX power connector, though older ones may have a 20-pin version. Locate it on the motherboard, often situated between the top and middle-right sections. This connector ensures compatibility with older boards that have a 20-pin configuration.
- ATX Main Power Connector Variations(20+4-pin): The main power plugs are labeled P1 or ATX and have a 20+4 pin configuration, allowing you to split them into two parts if needed.
- Securing the Connector: Before connecting the relevant cable, check the tab/clip to secure it. When unplugging, make sure you hold onto the clip before pulling it out.
ATX 12V Connector(4-pin, 8-pin, or combination)
Unlike the ATX power connector, which typically has 24 pins, the ATX 12V connector can come in 4-pin, 8-pin, or a combination of both configurations. Higher-end motherboards usually feature an 8-pin or dual 8-pin connectors to provide additional power to the CPU. Ensure you connect the appropriate cable to the CPU_PWR1 or similar labeled header.
- Variations in ATX 12V Connectors: While lower-end boards come with a single 4-pin CPU connector, mid/high or budget boards may have one 8-pin, one 8-pin and one 4-pin, or two 8-pin connectors.
- Connector Orientation: As with the main power connector, ATX 12V connectors come with tabs to ensure correct orientation and require minimal force to insert.
MOLEX Connectors
While MOLEX connectors are typically associated with powering peripherals like floppy drives and fans, some high-end motherboards incorporate them for additional power support, such as when using multiple graphics cards. Always check your motherboard’s specifications for such exceptions.
- High-End Motherboard Power Demands: If you’re building a high-end rig with(8+4) pin CPU connectors and additional MOLEX connectors, selecting an appropriate PSU that meets your power demands is essential.
- ATX12V Specifications: Manufacturers often recommend getting a PSU that supports the latest ATX12V specifications for stability when dealing with high-wattage motherboards.
Connectors for Storage Drives:
SATA Ports
Modern motherboards typically offer 6 to 8 SATA ports for connecting storage drives. Note that if you’ve already connected an NVMe SSD to an M.2 socket, some SATA ports may get disabled. Ensure that you connect both data and power cables to your SATA drives.
- SATA Port Location: SATA ports can be found soldered on the mainboard itself or grouped together somewhere between the middle and bottom-right corners. Each port is assigned a dedicated number, identified from the label imprinted on the PCB.
- SATA Versions and Compatibility: SATA ports can also be of different revisions, including SATA I(1.5 Gb/s), SATA II(3.0 Gb/s) and SATA III(6.0 Gb/s). While SATA ports are backward compatible, connecting a lower-revision drive to a higher-revision port limits it’s speed.
- Motherboard Specifications: Check your motherboard’s specifications to ensure that the dedicated SATA ports support the features you’re looking for, such as NCQ, AHCI, different RAID levels, NVMe SSD support, hot plugging, etc.
IDE / PATA Connectors
Although largely obsolete, older motherboards used IDE or PATA connectors for hard drives and optical drives. These connectors used a 40-pin ribbon cable for data and required a MOLEX connector for power.
- PATA Data Transfer Speed: IDE/PATA hard drives used a 40-pin ribbon cable for data transfer, offering a maximum speed of 133 MB/s. MOLEX connectors provided power to PATA drives.
- Legacy Compatibility: IDE/PATA connectors were standard on older motherboards before the widespread adoption of SATA. If you’re working with legacy hardware, you may still encounter these connectors.
Fan Connectors:
CPU Fan Header
Located near the CPU socket and usually labeled CPU_FAN, this header is designed for the CPU cooler. It’s crucial to have at least one cooler connected here to prevent CPU fan errors.
- Cooler Power Rating: Most motherboards are rated to support CPU fan power of 12 W(1 A), but it’s essential to verify this in your user manual.
- Radiator Fans: Radiator fans on AIO(All-In-One) coolers or custom loops should also be connected to the CPU_FAN header for optimal performance.
Optional CPU Fan Headers
Some motherboards, especially mid to high-end ones, provide additional CPU fan headers like CPU_OPT or CPU_FAN2 for multiple cooling fans, such as those used with radiators or large heatsinks.
- Configuring Optional Headers: The general idea is to connect the primary CPU cooler to the CPU_FAN header and use the optional headers for additional fans that require the same connection.
Chassis/Case/System Fan Headers
These headers, often labeled CHA_FAN or SYS_FAN, are meant for case fans that help maintain optimal system temperatures. Depending on your motherboard model, you can find multiple headers to accommodate various case fan configurations.
- Case Fan Varieties: Users often install multiple fans in various locations within the case, such as the top, right, rear and front. Most manufacturers offer several relevant headers to cater to this demand.
AIO/Water Pump Headers
Specialized motherboards designed for water cooling setups may include dedicated headers for AIO pumps, labeled AIO_PUMP, B_PUMP, or WP. Always refer to your motherboard’s manual to confirm the correct header for your cooling system.
- Water Cooling Pump Compatibility: Not all motherboards support dedicated water pump headers. In such cases, the CPU_FAN header may suffice. Some AIOs come with a combination of connectors for radiator fan speed control, pump power and RGB features. Always check your motherboard’s manual before proceeding.
- Configuring Cooler Connectors: The configuration of connectors for coolers can vary between systems. It’s crucial to consult your motherboard’s manual to ensure proper installation, especially when setting up AIO or custom water cooling.
RGB / ARGB LED Headers:
Addressable LED Headers(ARGB)
If your fans or LED strips support addressable RGB(ARGB) lighting, connect them to the Addressable LED headers, often labeled ADDR_LED, JRAINBOW, or D_LED. These headers have a 3-pin configuration and support LED strips with a power rating of 15W(5V and 3A).
- ARGB vs. RGB: ARGB headers allow for individual LED control, offering dynamic and more complex lighting effects compared to standard RGB headers.
Non-Addressable LED Headers(RGB)
For standard RGB devices, use the non-addressable LED headers, typically labeled RGB_LED or similar. These headers have a 4-pin configuration and can power both regular LED strips and RGB fans, with a maximum load of +12V(3A, 36W).
- RGB Lighting Effects: RGB headers provide a variety of lighting effects, including static colors, breathing effects and color cycling, usually controlled through motherboard software or a dedicated controller.
- RGB Header Expansion: If you plan to connect multiple RGB devices, consider using RGB splitters or hubs to expand the number of devices you can control with a single RGB header.
Front Panel Connectors:
System Panel Header
This crucial header is used to connect the power switch, reset button, power LED and hard drive activity LED from your case to the motherboard. Look for labels like PANEL, F_PANEL, or JFP1 on the PCB.
- Front Panel Diagram: Most motherboard manuals include a detailed diagram illustrating the pinout for the system panel header. This diagram helps ensure the correct connection of each component from your case.
USB Headers
USB headers allow you to connect extra USB ports on your case to the motherboard. Motherboards come with various USB generations and types, so ensure you plug the module cable into the appropriate header, such as F_USB, J_USB, or similar.
- USB Types and Standards: USB headers can support different USB types and standards, including USB 2.0 and USB 3.0/3.1 Gen 1/Gen 2. Ensure compatibility between your case’s USB ports and the motherboard’s headers.
- USB Expansion: If you require additional USB ports or different USB types, consider using PCIe USB expansion cards or internal hubs.
Audio Headers
The audio header, often labeled AAFP or HD_AUDIO1, enables the microphone and headphone ports on your case to function. This eliminates the need to access hard-to-reach motherboard audio ports.
- Audio Quality: Depending on your motherboard, audio headers can support high-definition audio codecs, ensuring excellent sound quality for gaming and multimedia purposes.
- Front Panel Audio Diagram: As with the system panel header, motherboard manuals typically provide diagrams for proper front panel audio connections.
Additional Headers:
Thunderbolt Header
High-end motherboards designed for Thunderbolt support may include a dedicated header for Thunderbolt I/O cards. Be sure to verify the pin configuration based on your motherboard model.
- Thunderbolt Expansion Cards: If your motherboard lacks a Thunderbolt header, you can still add Thunderbolt support through PCIe expansion cards.
Clear CMOS Header
This header, available in both 2-pin and 3-pin configurations, is used for clearing the CMOS settings, which can be helpful during troubleshooting.
- CMOS Clearing Process: To reset your motherboard’s settings, turn off the computer, move the jumper cap(if applicable), wait for a few seconds and then return it to it’s original position. Alternatively, you can use a screwdriver to briefly bridge the two CMOS clear pins.
Temperature Sensor Header
Some motherboards offer a header for connecting thermal sensors to monitor temperatures of various components, such as the CPU, GPU and motherboard.
- Temperature Monitoring Software: To utilize temperature sensors effectively, you’ll need software that can read and display sensor data. Popular options include HWMonitor, Core Temp and Open Hardware Monitor.
TPM Module Connector
For enhanced security, motherboards may include a TPM(Trusted Platform Module) header to attach TPM modules.
- BitLocker Encryption: TPM modules are often used in conjunction with Windows BitLocker to enhance data security through hardware-based encryption.
Noise Detection Header
High-end motherboards may feature a noise detection header, which allows you to monitor sound pressure levels and adjust fan speeds accordingly.
- Fan Control Software: To utilize noise detection features, you’ll need motherboard software or third-party applications to fine-tune fan speed profiles based on noise levels.
Conclusion
In conclusion, understanding motherboard connectors and headers is essential for building a reliable and functional computer system. By familiarizing yourself with the various types of connectors and their functions, you can ensure that your hardware components work seamlessly together.
Whether you’re connecting power cables, storage drives, cooling fans, or RGB lighting, each connector serves a specific purpose. Additionally, knowing how to properly connect front panel components, such as the power switch and USB ports, can make the assembly process more straightforward.
Keep in mind that motherboard designs can vary and it’s essential to consult your motherboard’s manual for precise information on connectors and headers. By following the manufacturer’s guidelines and referring to this comprehensive guide, you’ll be better equipped to build or upgrade your computer system effectively.
Building a computer is an exciting endeavor and understanding motherboard connectors and headers is a fundamental step towards achieving a successful build. Whether you’re a seasoned enthusiast or a newcomer to PC building, the knowledge gained from this guide will empower you to tackle your next project with confidence.
As technology evolves, so do motherboard designs and connector types. Stay informed about the latest developments in the world of motherboards to ensure that your future builds are compatible with the latest hardware innovations.
With this extensive guide at your disposal, you’re well on your way to mastering the art of motherboard connectors and headers. Happy building!
Other Technical Reviews:- Reviews


