Motherboards are the backbone of our computer systems, connecting and coordinating various components to ensure seamless functionality. However, one common issue that many users face is a non-working HDMI port on their motherboard. In this comprehensive guide, we will delve into the reasons behind this problem and provide you with actionable solutions to fix it.
Understanding the Importance of the Motherboard HDMI Port
Before we dive into troubleshooting, let’s understand why motherboards have HDMI ports in the first place. The HDMI (High-Definition Multimedia Interface) port allows you to connect an external display to your computer without the need for a dedicated graphics card. This is particularly useful for users who do not require a powerful graphics solution and prefer the convenience of integrated graphics.
Troubleshooting Steps to Fix a Non-Working HDMI Port
If you’re experiencing issues with your motherboard HDMI port, there are several steps you can take to diagnose and resolve the problem. Let’s explore these troubleshooting steps in detail:
Step 1: Check Physical Connections and Cables
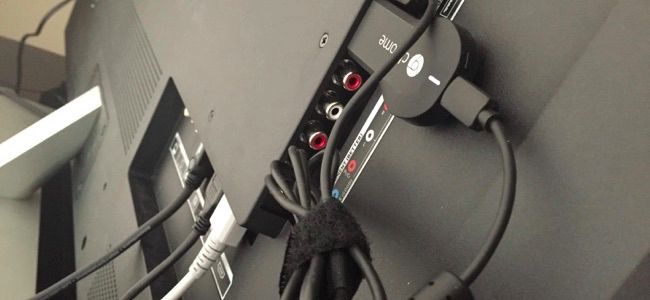
The first and simplest step is to ensure that all physical connections are secure and properly plugged in. Check if the HDMI cable is firmly connected to both the motherboard and the monitor. Sometimes, a faulty cable can be the culprit behind the non-working HDMI port. Consider trying a different HDMI cable to rule out any cable-related issues.
Additionally, inspect the HDMI port on your motherboard for any signs of damage or loose connections. Broken contacts or desoldered joints can prevent the HDMI port from functioning correctly. If you notice any physical damage, you may need to replace the motherboard or send it for repair.
Step 2: Verify CPU Compatibility with Integrated Graphics
Modern processors commonly come with integrated graphics, allowing users to utilize the HDMI port on their motherboards. However, it’s essential to ensure that your CPU supports integrated graphics. If your CPU does not have integrated graphics, the HDMI port on your motherboard will not work, regardless of any troubleshooting efforts.
To determine if your CPU supports integrated graphics, refer to the specifications of your processor. You can usually find this information in the BIOS or through Windows-based utilities. If your CPU does not support integrated graphics, you will need to rely on a dedicated graphics card for display output.
Step 3: Check BIOS Settings
The BIOS (Basic Input/Output System) settings play a crucial role in enabling or disabling integrated graphics on your motherboard. If your integrated graphics are disabled in the BIOS, the HDMI port will not function correctly. Let’s explore how to access and modify these settings:
- Start your computer and enter the BIOS. The key to access the BIOS varies depending on the manufacturer but is often displayed during the startup process. Common keys include ESC, F1, F2, F8, F12, or Delete.
- Once in the BIOS, navigate to the graphics settings. The location may vary depending on your motherboard manufacturer. Look for options such as “Integrated Graphics Configuration,” “NB Configuration,” “SA Configuration,” “Chipset Configuration,” or “AMD CBS.”
- Enable the integrated graphics setting by selecting the appropriate option. The exact wording may differ, but it could be “Enable GPU,” “Integrated Graphics,” or “IGPU Multi-Monitor.” Save the changes and exit the BIOS.
- Connect your display device to the motherboard’s HDMI port and verify if your monitor detects the connection. Ensure that the HDMI cable is properly connected to both the monitor and the motherboard.
If the integrated graphics option is already enabled in the BIOS, check if there’s a “Primary Video Device” setting. If this setting is configured to “PCIe Video” instead of “IGFX Video,” the HDMI port on your motherboard may not work correctly. Switch the setting to “IGFX Video” to enable the motherboard’s HDMI port.
Step 4: Update or Reinstall Graphics Drivers
Outdated or corrupted graphics drivers can also cause issues with the HDMI port on your motherboard. Updating or reinstalling the drivers can help resolve these problems. Follow these steps to update your graphics drivers:
- Open the Device Manager on your Windows computer.
- Expand the “Display Adapters” category.
- Right-click on your integrated graphics driver and select “Update Driver.”
- Choose the option to search automatically for drivers. Windows will search for the latest drivers and install them if available.
If Windows indicates that the best drivers are already installed, you can manually search for drivers through Windows Update. Some graphics drivers may be listed under the “Optional updates” section. Check for any driver updates related to your integrated graphics.
If updating the drivers doesn’t resolve the issue, consider downloading the latest VGA drivers from the motherboard’s official website. You can also find relevant drivers on the Intel or AMD support pages. Install the drivers and restart your computer to ensure the changes take effect.
Step 5: Final Troubleshooting Steps
If none of the above steps resolve the issue, you may need to perform additional troubleshooting. Consider the following steps:
- Verify if the HDMI cables are functioning correctly by testing them with other devices.
- If the HDMI port on your motherboard still doesn’t work, there may be an issue with the firmware. Try updating your BIOS to the latest version, as this can often resolve compatibility or stability issues.
- If you’re experiencing a black screen even after connecting the HDMI cable to the graphics card, check for any red or orange lights on the motherboard. This can indicate issues with other components rather than the HDMI port itself. In such cases, consult a computer expert for further assistance.
- As a last resort, consider contacting the vendor or manufacturer for support. Check your warranty and report the specific issue you’re facing. They may provide guidance or offer a replacement if necessary.
Conclusion
Troubleshooting a non-working HDMI port on a motherboard may seem daunting, but with the right steps, you can resolve the issue. By checking physical connections, verifying CPU compatibility, adjusting BIOS settings, updating drivers, and performing additional troubleshooting, you can likely restore functionality to your HDMI port.
Remember to double-check all physical connections, cables, and ports, and ensure that your CPU supports integrated graphics. Configuring the BIOS settings correctly and keeping your graphics drivers up to date are essential for optimal HDMI performance.
If you encounter any difficulties during the troubleshooting process, do not hesitate to seek assistance from a computer expert. With their expertise, they can diagnose and resolve any underlying hardware or software issues that may be affecting your motherboard’s HDMI port.
By following this comprehensive troubleshooting guide, you can overcome the challenges of a non-working HDMI port and enjoy seamless connectivity between your computer and external displays.