Quick Settings in Android 12 have undergone a visual update, bringing new options and a fresh look to the tiles that sit above the notification shade. This article will guide you through the process of customizing your Quick Settings on Android 12, allowing you to personalize the tiles and prioritize the settings that are most important to you.
Quick Settings in Android 12
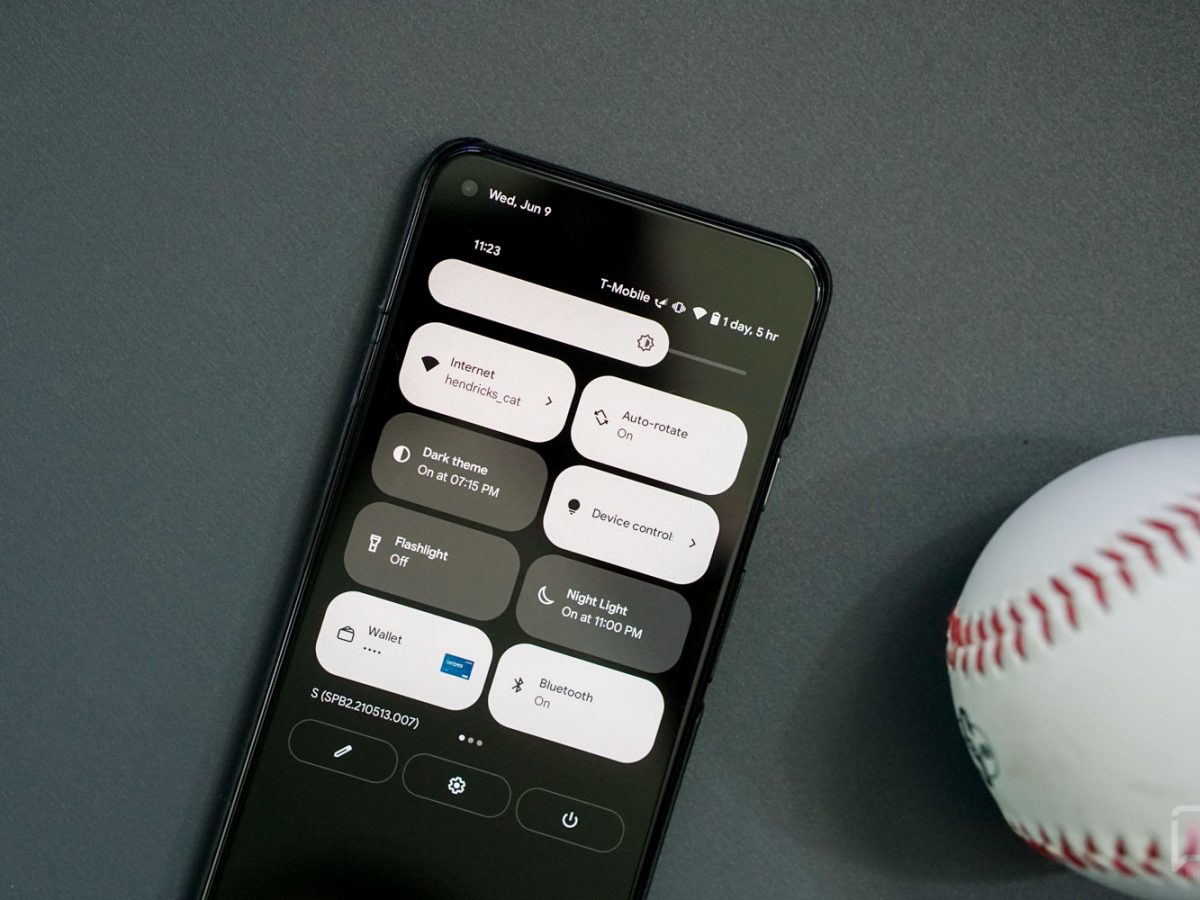
Before we dive into the customization process, let’s take a closer look at Quick Settings in Android 12. Quick Settings is a panel of fast-access tiles that can be accessed by swiping down from the top of your device’s screen. In Android 12, there are two versions of Quick Settings: the full panel and the partial view.
The full Quick Settings panel can be accessed by swiping down twice from the top of your display or swiping down once with two fingers side by side. This view provides an expanded set of tiles, giving you quick access to various settings and shortcuts. On the other hand, the partial Quick Settings view appears when you swipe down a single time from the top of your screen. It displays a limited number of shortcuts, typically four tiles in Android 12.
Customizing Quick Settings on Android 12
Now that you have a better understanding of Quick Settings, let’s get into the customization process. Follow these steps to personalize your Quick Settings tiles:
- Access Quick Settings: Start by pulling down your notification shade and then pulling down again to expand the Quick Settings.
- Edit Quick Settings: Tap the pencil icon located below the tiles. This will allow you to enter the edit mode for Quick Settings.
- Rearrange or Remove Tiles: To rearrange or remove items in the list, simply hold and drag them to your desired position. If you want to remove a tile, drag it to the bottom of the screen. Conversely, if you want to add a tile, find the one you want and drag it up to the top.
- Add Custom Tiles: Android 12 also allows you to add custom tiles to your Quick Settings. These custom tiles can be created using third-party apps or widgets. To add a custom tile, find the app or widget you want to add and drag it to the top of the Quick Settings list.
- Explore Additional Options: Depending on the apps you have installed on your device, you may have additional options to customize your Quick Settings. For example, certain apps may offer specialized tiles that provide quick access to specific features or functionalities. Take some time to explore these options and add any tiles that enhance your Android experience.
By following these steps, you can easily customize your Quick Settings on Android 12 to suit your preferences and needs. Whether you want to rearrange the tiles, remove unnecessary options, or add custom shortcuts, the flexibility of Android 12 allows you to tailor your Quick Settings to your liking.
Power Shade: Taking Quick Settings Customization to the Next Level
While Android 12 offers built-in customization options for Quick Settings, you can take it even further with the help of third-party apps. One such app is Power Shade, a highly customizable tool that allows you to replace the default Quick Settings area with your own personalized alternative.
Power Shade provides a range of options to customize the appearance and functionality of your Quick Settings. With this app, you can recreate the pre-Android 12 Quick Settings style or design a completely unique layout that suits your preferences. Let’s take a closer look at how Power Shade can enhance your Quick Settings customization experience:
- Install Power Shade: Start by downloading and installing Power Shade from the Google Play Store. The basic features of the app are available for free, but there is an optional premium upgrade for advanced options.
- Launch Power Shade: Once installed, open Power Shade on your device.
- Explore the Default Settings: By default, Power Shade provides a Quick Settings panel that resembles Google’s older style, similar to Android 11 and earlier versions. You can use this default setting as it is or customize it further to match your preferences.
- Customize Appearance: Power Shade allows you to fine-tune the appearance of your Quick Settings. You can adjust the color scheme, icon style, transparency, and layout to create a personalized look.
- Add or Remove Tiles: Similar to the built-in Quick Settings customization, Power Shade lets you add or remove tiles to suit your needs. You can choose from a wide range of available tiles or create custom tiles using third-party apps or widgets.
- Expand the Panel: Power Shade also offers the option to expand the panel beyond the standard number of tiles. This allows you to display even more shortcuts and settings in the initial single-swipe view.
- Activate Quick Settings Gesture: One of the handy features of Power Shade is the ability to assign a gesture to access your Quick Settings panel. This eliminates the need to reach all the way to the top of your screen. Simply swipe your thumb down along the side edge of your device to trigger your customized Quick Settings panel.
With Power Shade, you have the power to create a Quick Settings experience that is tailored to your preferences. From customizing the appearance to adding extra tiles and implementing convenient gestures, this app takes Quick Settings customization to a whole new level.
Additional Tips and Tricks for Quick Settings on Android 12
Now that you know how to customize Quick Settings on Android 12 using both the built-in options and Power Shade, let’s explore some additional tips and tricks to enhance your Quick Settings experience:
1. Utilize Quick Settings Tiles
Take advantage of the various Quick Settings tiles available in Android 12. These tiles provide quick access to commonly used settings and features, such as Wi-Fi, Bluetooth, screen brightness, and more. Customize your Quick Settings to include the tiles that are most relevant to your daily needs.
2. Explore Third-Party Apps
In addition to Power Shade, there are several other third-party apps available on the Google Play Store that offer advanced Quick Settings customization options. Take some time to explore these apps and find the one that best suits your preferences and requirements.
3. Prioritize Your Most Used Settings
Arrange your Quick Settings tiles in a way that prioritizes the settings you use most frequently. This will make it easier and quicker to access the functions you need on a regular basis.
4. Create Custom Tiles
If you have specific apps or functions that you frequently use, consider creating custom tiles for them. This will allow you to access these features directly from your Quick Settings, saving you time and effort.
5. Experiment with Icon Styles
Play around with different icon styles to find one that matches your aesthetic preferences. Whether you prefer minimalist icons or colorful designs, Android 12 offers a range of options to choose from.
6. Use Quick Settings Gestures
In addition to the Quick Settings gesture provided by Power Shade, Android 12 also offers several built-in gestures that allow you to quickly access specific functions. For example, you can swipe down on the fingerprint sensor to open Quick Settings or double-tap the power button to launch the camera. Familiarize yourself with these gestures and customize them to suit your needs.
7. Keep Your Quick Settings Organized
As you customize your Quick Settings, make sure to keep them organized and decluttered. Remove any unnecessary tiles and arrange them in a logical order that makes sense to you.
8. Stay Up to Date with Android Updates
Android is constantly evolving, and new updates may introduce additional features and customization options for Quick Settings. Stay informed about the latest Android updates to make the most of your Quick Settings customization.
By following these tips and tricks, you can maximize the potential of Quick Settings on Android 12 and create a personalized and efficient user experience.
Conclusion
Customizing Quick Settings on Android 12 allows you to tailor your device to your preferences and streamline your daily interactions. Whether you choose to use the built-in customization options or third-party apps like Power Shade, the ability to personalize your Quick Settings gives you greater control over your Android experience.
Remember to prioritize your most frequently used settings, experiment with different icon styles, and keep your Quick Settings organized. With these tips and tricks, you’ll be able to navigate your device with ease and efficiency, making the most of Android 12‘s Quick Settings feature.
So go ahead, dive into the world of Quick Settings customization, and unlock the full potential of your Android 12 device!
Experiencing difficulties with your Device, check out our “How To” page on how to resolve some of these issues.