Encountering system instability or a PC that refuses to boot can be frustrating. In such cases, resetting the BIOS on your ASRock motherboard can often help resolve the issues at hand. This comprehensive guide provides detailed step-by-step instructions to help you successfully reset the BIOS on ASRock motherboards.
Method 1: Loading Default BIOS Settings
If you can access the BIOS page, you can easily load the default BIOS configuration. Follow these steps:
Start or restart your computer and press the BIOS key before the POST(Power-On Self-Test) completes. The BIOS key may vary, but it is typically Del or F2. If you’re unsure, consult your motherboard’s user manual or search online for the specific key.
Once you’re in the BIOS interface, locate and select the “Exit” tab or menu.
Within the “Exit” tab, look for the option to “Load UEFI Defaults” or “Load Optimized Defaults”.
Confirm the action by selecting “Yes” when prompted.
Next, choose the option to “Save Changes and Exit” to apply the default BIOS settings.
Confirm the action by selecting “Yes” again.
Your computer will reboot and the BIOS settings will be restored to their factory defaults.
Additional Tip: If your computer is set to legacy mode, access the BIOS first and use the dedicated keys indicated in the right pane. Typically, F9 applies the default values and F10 saves the changes.
Method 2: Using the Clear CMOS Button
ASRock motherboards often come equipped with a dedicated Clear CMOS button, allowing you to quickly reset the BIOS settings. Follow these steps:
- Shut down your computer.
- Wait until the PC is completely turned off before disconnecting the power plug.
- Locate the Clear CMOS button on the rear I/O panel or the system board. On the rear I/O panel, it is usually labeled “Clear CMOS” or “CMOS”.
- If the Clear CMOS button is on the rear I/O panel, simply press it to clear the CMOS values.
- If the Clear CMOS button is located on the motherboard itself, you may need to open the PC case to access it. Refer to your motherboard’s user manual for the specific location and instructions.
- Press the Clear CMOS button and hold it for a few seconds to ensure the CMOS values are cleared.
- Once you can access the UEFI interface, follow the instructions in Method 1 to load the factory BIOS values.
Method 3: Removing the CMOS Battery
If your ASRock motherboard doesn’t have a Clear CMOS button, you can reset the BIOS settings by removing the CMOS battery. Follow these steps:
Turn off your PC and cut off power from the PSU(Power Supply Unit).
Hold the power button for 10 to 15 seconds to discharge any residual static electricity.
Lay the PC flat on it’s side on a flat, tidy and anti-static surface.
Ensure you are properly grounded by wearing an anti-static wrist wrap and connecting it to a grounded surface.
Untighten the screws and open the PC chassis to access the motherboard.
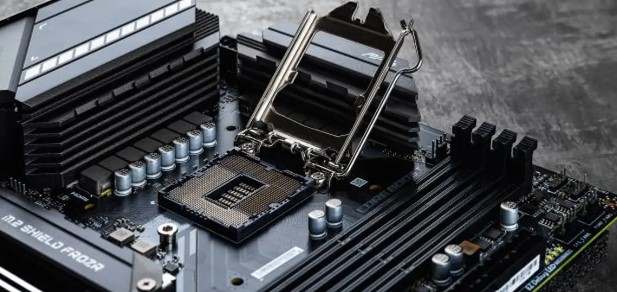
Locate the CMOS battery on the motherboard. It is a round, silver battery.
- If the CMOS battery has a white plug, disconnect it from the motherboard header. Wait for approximately 15 minutes before reinserting it.
- If the CMOS battery is an onboard battery, use an ESD(Electrostatic Discharge)-free tool, such as a plastic opening tool, to unlock the battery from it’s holder. Carefully remove the battery from it’s slot and reinsert it after a short period.
Close the side panel and secure it with the screws.
Plug back the power cord into the PSU and start your PC.
Enter the BIOS screen using the dedicated key specified for your motherboard model. Once in the BIOS, set the optimized defaults or load the UEFI defaults.
Save the changes and exit the BIOS.
Your computer will reboot with the BIOS settings reset to their factory defaults.
Method 4: Shorting the CMOS Jumper Pins
Another method to clear the CMOS values is by shorting the CMOS jumper pins on the motherboard. Follow these steps:
- Ensure the computer is turned off and unplug the power adapter.
- Hold the power button for at least 15 seconds to discharge any residual static electricity.
- Unscrew and open the PC casing to access the motherboard.
- Ground yourself properly to avoid static discharge by wearing an anti-static wrist wrap connected to a grounded surface.
- Locate the CMOS jumper pins on the motherboard. They are often labeled as “CLRCMOS1” or similar.
- If your motherboard has a 2-pin jumper:
- Touch both pins simultaneously with a screwdriver or any other metal conductor for approximately a minute to short-circuit the jumper pins and clear the CMOS values.
- If your motherboard has a 3-pin jumper:
- Remove the cap from it’s default position, usually covering the first two pins.
- Place the cap on the second and third pins to short the jumper.
- Leave the cap in this position for at least 15 minutes before returning it to the first and second pins.
- Reseat the PC chassis, ensuring all screws are securely fastened.
- Plug back the power cord and start your computer.
- Enter the BIOS screen using the dedicated key and follow the instructions in Method 1 to load the factory BIOS values.
Conclusion
Resetting the BIOS on ASRock motherboards can help resolve system instability, boot failures and other related issues. By following the detailed instructions provided in this guide, you can successfully reset the BIOS settings on your ASRock motherboard. Remember to consult your motherboard’s user manual for specific instructions related to your particular model, as there may be slight variations in the process.
Experiencing difficulties with your Device, check out our “How To” page on how to resolve some of these issues.